Save time searching for your students by using lists.
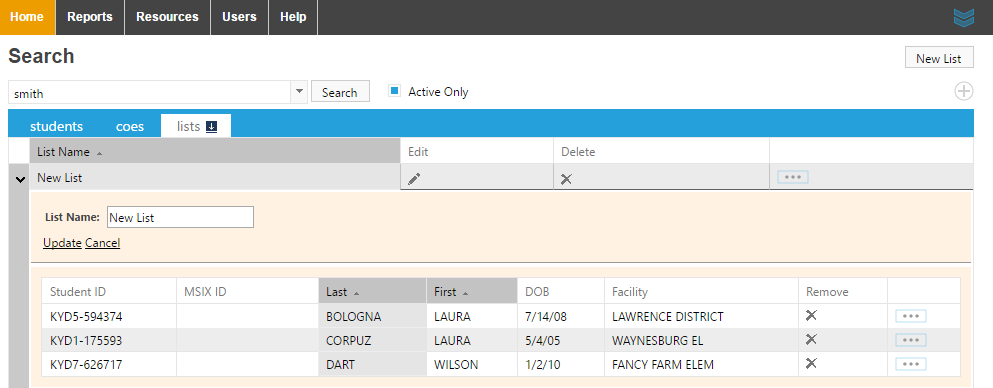
With the list feature you can create lists of students to save time entering data. Lists are managed on the lists tab. Here you can manage your list settings and enter data for one or more of the students on your list.
 Create a new list with the "New List" button in the upper right corner.
- Change the name of your new list by clicking the pencil icon in the Edit column.
- Delete a list by clicking the X icon in the Delete column.
- Remove a student from the list using the X icon in the Remove column.
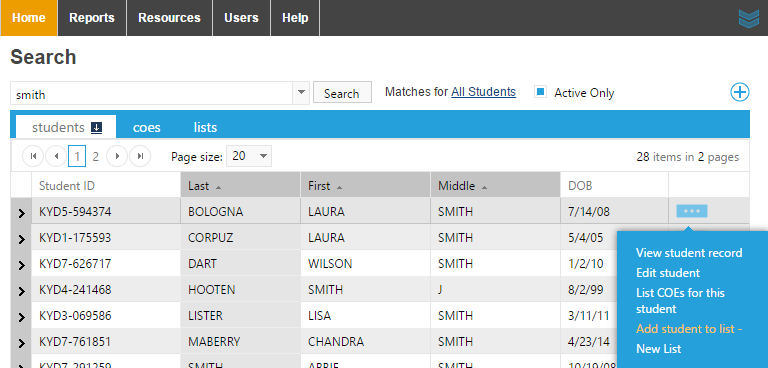
 Students can be added to a list on the students tab. After searching for your student, use the ellipsis menu to add the student to your list.
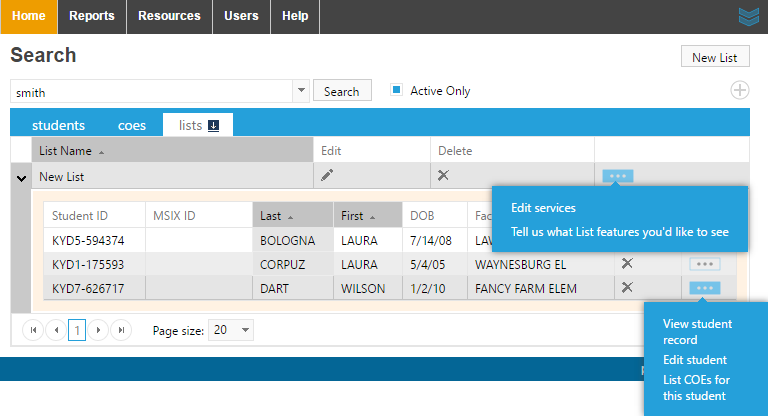
 Now that you have your list of students, you can edit services for the whole list or for a single student.